Showing posts with label Linux. Show all posts

Saturday, 9 March 2013

Install grub in redhat linux after installing windows


I  installed  window7 --> than  redhat 6 --> than again Window7

Now I am not getting to boot from redhat

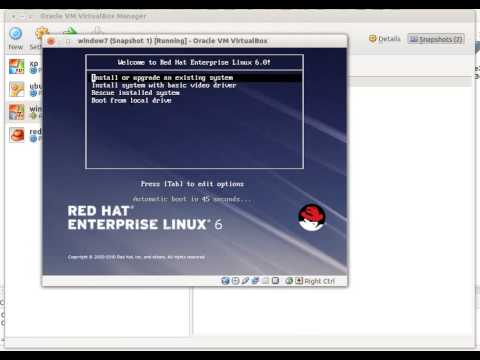
Boot from RHEL6 DVD.

Rescue installed system

Choose = Language, Keyboard,

Rescue Method = Local CD\DVD

Setup Networking = Yes / No  (any),

Rescue Screen = Continue

First Aid Kit quickstart menu = shell Start shell.

bash-4.1#chroot /mnt/sysimage
bash-4.1#cd /boot/grub
bash-4.1#fdisk -l
bash-4.1#grub-install /dev/sda1

If no error reboot the the system.

Friday, 8 March 2013

window 7 and Redhat 6 dual boot

Wednesday, 6 March 2013

Install grub in ubuntu linux after installing windows

If you install window  first and than install Ubuntu.

Because of some problem you install window again after Ubuntu installation.

Now you are not getting the option of Ubuntu.

TO get the Ubuntu option you have to install Ubuntu grub again on HARD DISK.

For that   Boot from the same version of  Ubuntu you installed earlier.

Select the Try Ubuntu 

open terminal

########## Find the Linux partition with ##########

sudo fdisk -l


Disk /dev/sda: 320.1 GB, 320072933376 bytes
255 heads, 63 sectors/track, 38913 cylinders, total 625142448 sectors
Units = sectors of 1 * 512 = 512 bytes
Sector size (logical/physical): 512 bytes / 512 bytes
I/O size (minimum/optimal): 512 bytes / 512 bytes
Disk identifier: 0x000cf1c8

   Device Boot         Start            End             Blocks        Id         System
/dev/sda1   *           2048         206847          102400         7       HPFS/NTFS/exFAT
/dev/sda2            206848        184322047     92057600     7       HPFS/NTFS/exFAT
/dev/sda3         184324094     391354367    103515137     5       Extended
/dev/sda4         391354368     625137663    116891648    7       HPFS/NTFS/exFAT
/dev/sda5         184324096     360103935    87889920      83      Linux
/dev/sda6          360105984    391354367    15624192      82      Linux swap / Solaris


########## mount the linux partition on /mnt ##########

sudo mount /dev/sda5 /mnt

########## mount (bind) the live CD  Dir with installed linux Dir ##########


sudo mount --bind /proc /mnt/proc

sudo mount --bind /dev /mnt/dev

sudo mount --bind /sys /mnt/sys

########## Get the root privilege ##########

chroot /mnt

########## Install the grub  ##########

grub-install /dev/sda


Tuesday, 25 September 2012

metasploit window7 hacking

Monday, 24 September 2012

metasploit windowXP Hacking (silent)

metasploit windowXP Hacking (remote Desktop)

Sunday, 16 September 2012

how to sniff password with cain & able

Saturday, 8 September 2012

Forensics:Picture Has Been Photoshopped or Not

1.Open the website http://fotoforensics.com/
2. Upload the picture you want to verify.
see the result  

example:
photoshopped image


you can see image color difference is very much.
Original Image


you can see image color difference is very much.


for more information you can read the tutorial 


Wednesday, 5 September 2012

E-book for linux Command line reference

Saturday, 1 September 2012

qemu configuration on gns3 on ubuntu linux


root@techxpert:/opt/GNS3#cd qemu
root@techxpert:/opt/GNS3/qemu#wget http://download.savannah.gnu.org/releases/qemu/qemu-0.11.0.tar.gz

installing and patching the Qemu

root@techxpert:/opt/GNS3/qemu#tar xvzf qemu-0.11.0.tar.gz
root@techxpert:/opt/GNS3/qemucd qemu-0.11.0

root@techxpert:/opt/GNS3/qemu/qemu-0.11.0#wget http://downloads.sourceforge.net/gns-3/qemu-0.11.0-olive.patch?download


rename the file qemu-0.11.0-olive.patch?download ---> qemu-0.11.0-olive.patch


root@techxpert:/opt/GNS3/qemu/qemu-0.11.0#patch -p1 -i qemu-0.11.0-olive.patch
root@techxpert:/opt/GNS3/qemu/qemu-0.11.0#./configure
root@techxpert:/opt/GNS3/qemu/qemu-0.11.0#make


root@techxpert:/opt/GNS3/qemu/qemu-0.11.0#sudo make install

Open Gns3  Go to  menu-->edit--preferences-->General setting

path of qemuwrapper = /opt/GNS3/GNS3-0.8.3.1-src/qemuwrapper/qemuwrapper.py
working direcatory = /opt/GNS3/tmp
path of qemu= /usr/local/bin/qemu
path of  qemu-img=/usr/local/bin/qemu-img

Now open option qemu Guest

Identifier name =  your name
Binary image = location where you have saved
left default all options.


configure virtual box on gns3 on ubuntu

gns3 installation on Ubuntu linux


Installing dependencies

techxpert@techxpert:~/Desktop$ su
Password:
root@techxpert:/home/techxpert/Desktop# cd /
root@techxpert:/#
root@techxpert:/#apt-get update
root@techxpert:/#apt-get install python
root@techxpert:/#apt-get install qt4-dev-tools
root@techxpert:/#apt-get install pyqt4-dev-tools
root@techxpert:/#apt-get install libncurses5-dev zlib1g-dev libsdl-dev libpcap-dev

Step: 2
root@techxpert:/# cd /opt/
root@techxpert:/opt# mkdir GNS3
root@techxpert:/opt# chmod 777 GNS3
root@techxpert:/opt# cd GNS3/

Step : 3
Creating Folders

root@techxpert:/opt#mkdir Dynamips
root@techxpert:/opt#mkdir IOS
root@techxpert:/opt#mkdir Project
root@techxpert:/opt#mkdir Cache
root@techxpert:/opt#mkdir tmp
root@techxpert:/opt#mkdir qemu

Step : 4
Assign Folder Permissions
root@techxpert:/opt#chmod 777 *

Download GNS3 source
from http://www.gns3.net/download/

Download Dynamips
form http://www.gns3.net/download/

Step : 5

Setting up the GNS3 files and Permission

root@techxpert:/opt/GNS3#tar -xjvf GNS3-0.8.2-src.tar.gz
root@techxpert:/opt/GNS3#rm GNS3-0..8.2–src.tar.gz
root@techxpert:/opt/GNS3#chmod 777 GNS3-0..8.2–src
root@techxpert:/opt/GNS3#cd GNS3-0.8.2-src
root@techxpert:/opt/GNS3#chmod 777 *.*

Step : 6
Settingup the permission for Dynamips
root@techxpert:/opt/GNS3/Dynamips#chmod 777 dynamips-0.2.8-RC2-amd64.bin

Monday, 27 August 2012

apache2 php mysql phpmyadmin installation on Ubuntu


techxpert@server:~$su -

2 Installing MySQL 5


root@server:~#apt-get install mysql-server mysql-client

3 Installing Apache2

root@server:~# apt-get install apache2


4 Installing PHP5

root@server:~#apt-get install php5 libapache2-mod-php5

root@server:~#/etc/init.d/apache2 restart

5 Testing PHP5 / Getting Details About Your PHP5 Installation

root@server:~#gedit /var/www/phpinfo.php

<?php phpinfo(); ?>


6 Getting MySQL Support In PHP5


root@server:~#apt-get install php5-mysql php5-curl php5-gd php5-intl php-pear php5-imagick php5-imap php5-mcrypt php5-memcache php5-ming php5-ps php5-pspell php5-recode php5-snmp php5-sqlite php5-tidy php5-xmlrpc php5-xsl 


root@server:~#/etc/init.d/apache2 restart

7 phpMyAdmin

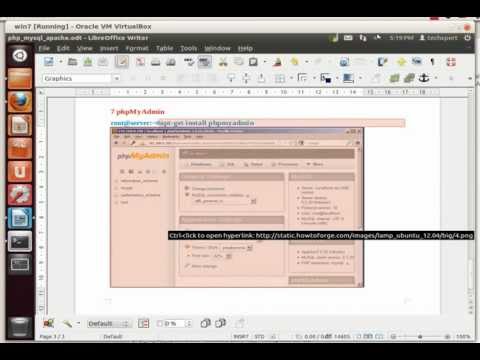
root@server:~#apt-get install phpmyadmin


Friday, 24 August 2012

Dual boot window7 and ubuntu 12.04 LTS

How to install Ubuntu 12.4